Complete and Efficient Ways to Recover Data from Locked/Disabled iPhone
Basically, all iOS devices users tend to set a password on their devices such as iPhone to keep personal privacy. However, if you type in the incorrect password on your iPhone for six successive times, there will appears a message read that your iPhone has been disabled. Have you ever had the experience of forgetting your password so that you can't unlock it? This article will share 5 practical ways to recover data from locked iPhone with or without backups.
Part 1: Is It Possible to Recover Data from Locked iPhone?
At first, you might be wondering that is there any possibility to recover data from locked iPhone? Well, the answer is absolute "Yes". If you have iTunes installed on your computer, the software will automatically backup your iPhone data when you connect the device to computer. If you haven't, the iPhone itself has an auto-sync feature, which allows data to be synced to iCloud when your iPhone is in charge or connected with Wi-Fi.
Part 2: How to Recover Data from Locked iPhone without Backup
However, as only 5GB space on iCloud is available, sometimes the latest data on your iPhone could not be backed up. If you also don't have other backups, in this case, you are suggested to use TunesKit iPhone Data Recovery. This program will help you recover data from your locked iPhone with the shortest amount of time in the case of no backup. This iOS Data Recovery tool is truly the most efficient and convenient one for you to choose. It can contribute to retrieve up to 20 file types including photos, videos, iMessages, notes, calendars, and other data from your iPhone. With the mighty recovery feature, users can retrieve the lost data from apps like Kik, Whatsapp, Viber, etc. The reasons why it is recommended is listed below.
Key Features of TunesKit iPhone Data Recovery
- Restore multiple data on your device including SMS, iMessages, photos, etc.
- Fully compatible with all iOS devices and versions including iOS 16.
- Support previewing and selecting required data before recovery.
- Provide 3 smart Data Recovery Modes for you to choose.
You can download a free trial version of TunesKit iPhone Data Recovery for Mac or Windows on your computer in advance, and then follow the tutorial below to recover data from locked iPhone.
Step 1 Connect iPhone to computer
Launch TunesKit iPhone Data Recovery on your computer and connect your locked iPhone to the computer via a USB cable. After that, select "Recover from iOS" option on the top menu bar.
Note: Please use the computer that you've once connected your iPhone to and trusted before, so it won't ask you to Turst This Computer on your device and thus bypass the passcode.
Step 2 Scan and preview
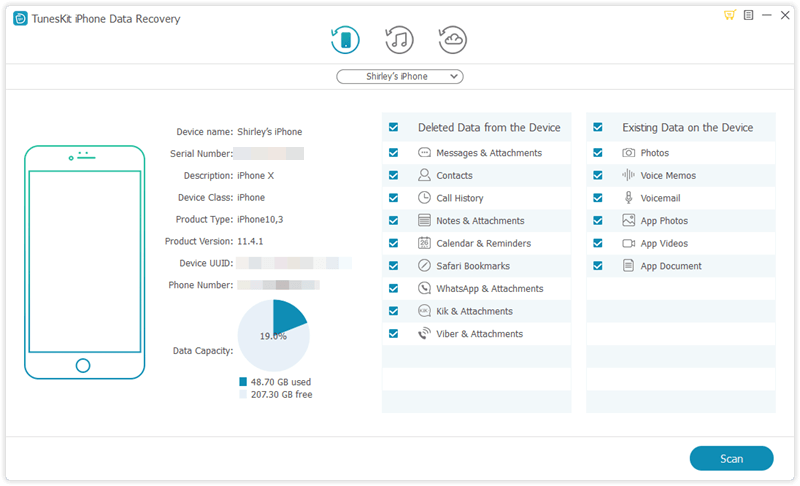
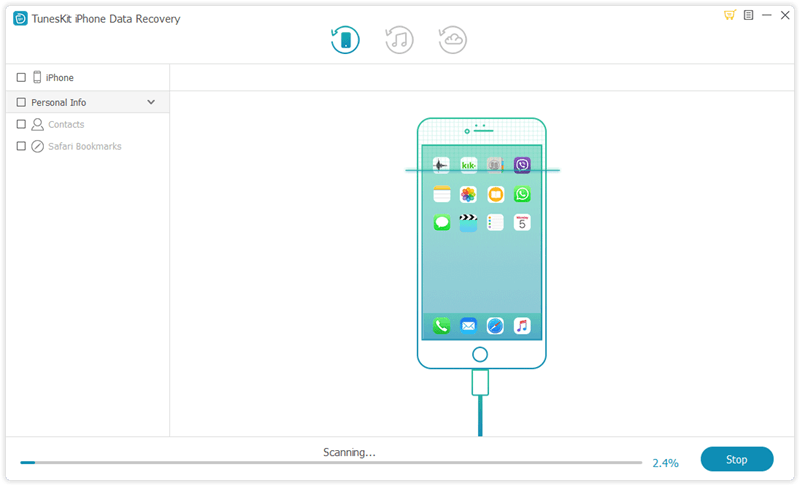
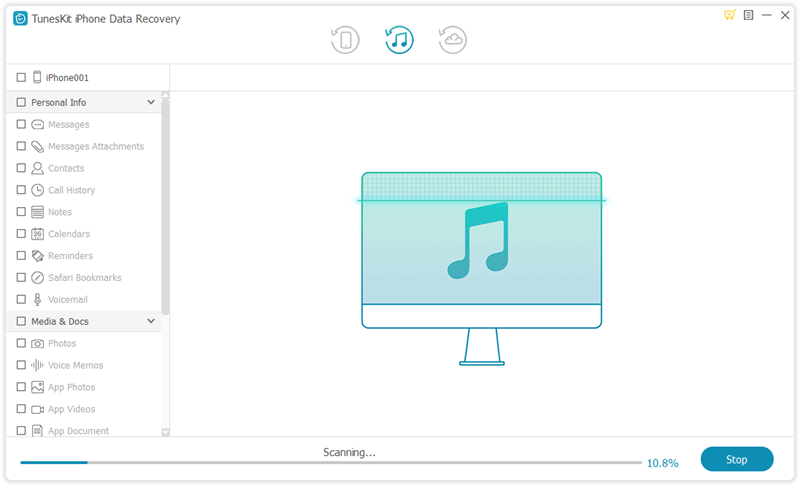
Select the categories you would like to recover on the interface. Then click the "Scan" button and wait the scanning process for just a few minutes.
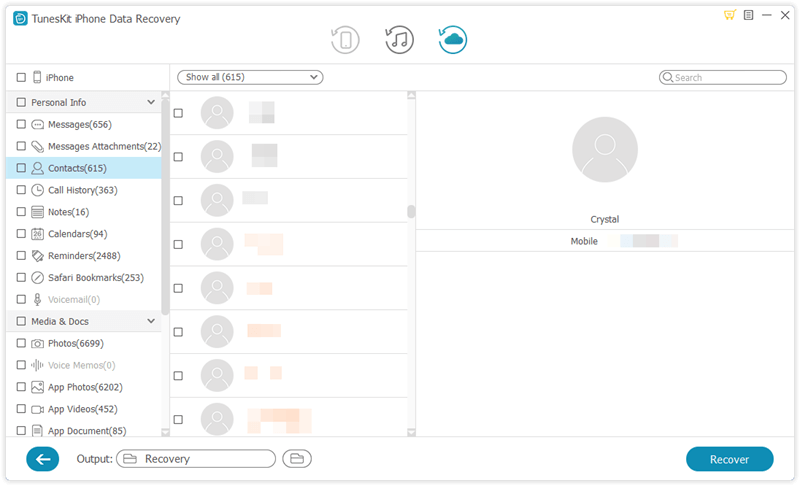
Step 3 Recover data from locked iPhone
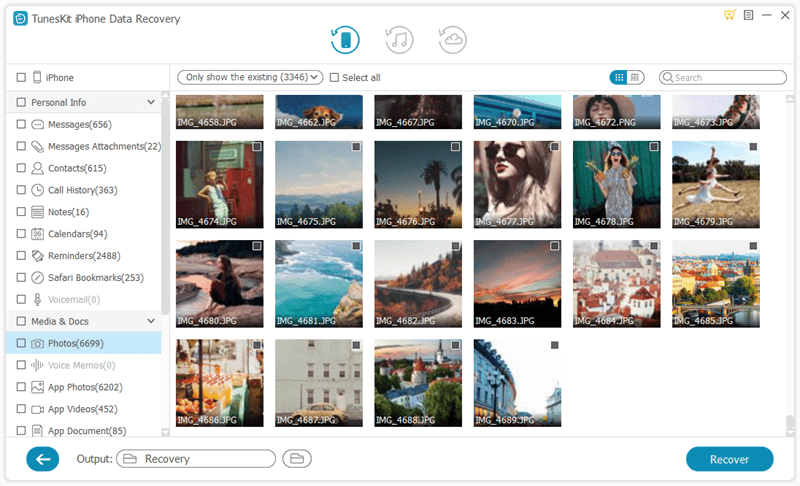
You can preview all recoverable files as shown above. Next select the files you intend to retrieve and click "Recover" button. Soon after that you will find those data back on your computer.
Part 3: How to Recover Data from Disabled iPhone with Backups
Method 1: Retrieve Data from iTunes Backup
Option 1: Recover Locked iPhone Data via TunesKit iTunes Recovery Mode
If you have backups, you can directly use TunesKit iPhone Data Recovery to recover data from your locked or disabled iPhone efficiently and selectively through its "Recover from iTunes" mode. The specific steps are as follows.
Step 1: Select iTunes backup file. Begin by launching TunesKit iPhone Data Recovery and select "Recover from iTunes Backup" from the main menu, then the application will start detecting all the available iTunes backup files on your computer.

Step 2: Start scanning lost files. Select the type of data you want to restore and click "Scan". Then you need to wait until the extracting process finished.
Step 3: Preview and recover. Now you can view all recoverable files since all available data display on the interface. Select the data you want to restore and click "Recover" to retrieve it to your computer.

Option 2: Recover Data from Locked iPhone via iTunes
Of course, if you are more willing to restore data from iTunes, you are also able to make it by following 3 steps below.
Step 1: Backup your locked iPhone using iTunes. There is no need to enter password to backup if you made a backup previously and did not restart your iPhone after connecting it to iTunes last time. Therefore, things become easy to solve, what you need to do is back up your locked iPhone as always. Just connect your iPhone to the computer and launch iTunes.
Step 2: Efface your iPhone. Then you can start erasing your iPhone after you finish backing up the data on the locked iPhone.
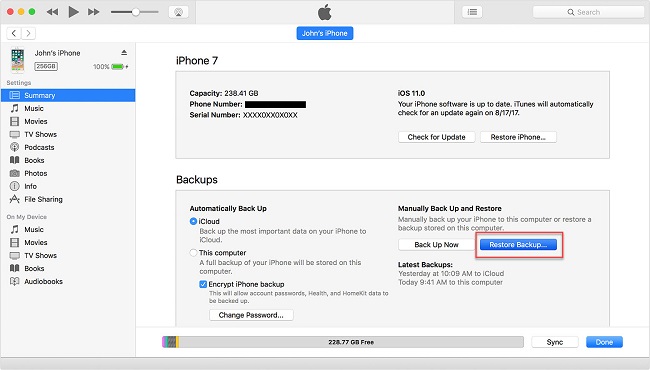
Step 3: Recover the backup files to iPhone. Now that your iPhone is unlocked, however, there is completely no data on the device. To restore data to the iPhone, click the "Summary" option on navigation pane on the left side, and choose "Restore Backup..." option.
Method 2: Retrieve Data from iCloud Backup
Option 1: Recover Locked iPhone Data via TunesKit iCloud Recovery Mode
Since you've backed up your data to iCloud, the iCloud backup of TunesKit iPhone Data Recovery is also an excellent way to recover data from locked iPhone effectively. You don't even have to use your locked/disabled iPhone during the recovery process. Now just follow the simple step-by-step tutorial below.
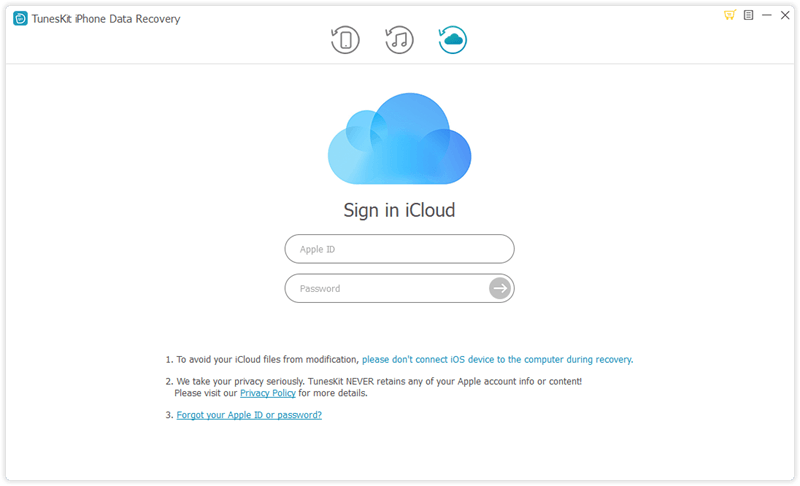
Step 1: Sign into iCloud account. Launch TunesKit iPhone Data Recovery on the PC and pick the "Recover from iCloud Backup" mode this time. Log into your iCloud account with correct Apple ID and passcode.
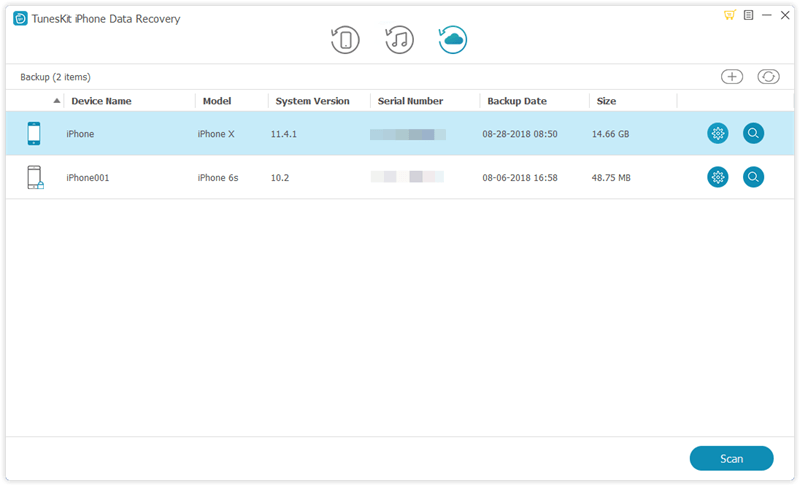
Step 2: Extract iCloud backup file. Once you entered the iCloud account successfully, you'll see all your iCloud backup files in a list. Choose the right one that may contain your lost data and then click the "Download" button.
Step 3: Retrieve data from iCloud backup. After the download ends, all files will be shown in categories on the left. You can now preview them one by one and tick the ones you want to restore. Afterwards, click the "Recover" button to get them back immediately.
Option 2: Recover Data from Disabled iPhone via iCloud
To recover data from iCloud on locked iPhone, you have to first remove your locked passcode through iCloud remotely. Then you can follow the quick guide below to restore the data.
Step 1: Visit the official website (www.iCloud.com) on the browser of your computer or iPad and then enter the Apple ID and password to sign into your iCloud account.
Step 2: Click on "All Devices" button and then choose the locked iPhone you want to erase.
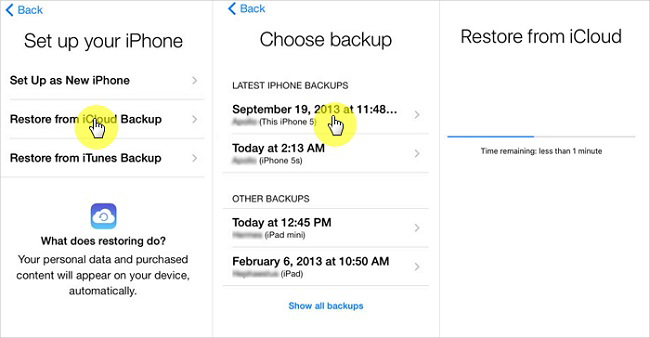
Step 3: Press on the "Erase iPhone" option and all the data will be gone, as do the screen password. Next restore your iPhone from iCloud backup as instruction on the screen.
Part 4: Hot FAQs about Locked/Disabled iPhone
Q1: What can cause a disabled iPhone?
Generally, a disabled iPhone is caused by wrong password attempts. The more times you enter the wrong passcode, the longer your iPhone will stay disabled. Notice that if you input the incorrect passcode for too many times, your iPhone will be disabled permanently.
Q2: Can I unlock disabled/locked iPhone?
Yes. It's not hard for you to unlock disabled/locked iPhone. You can either choose to restore your iPhone via iTunes or iCloud without unlocking your disabled iPhone. Furthermore, you are suggested to use TunesKit iPhone Unlocker to unlock disabled/locked iPhone in this case. It's a professional iOS tool that can help you unlock your iPhone at home without passcode.
Part 5: The Bottom Line
As is shown from the above, you can use TunesKit iPhone Data Recovery to recover data from locked or disabled iPhone whether you have a backup or not. In fact, TunesKit is capable of rescuing your data no matter how you lost it, for example, iOS upgrade failure, jailbreak error, improper operation, device damage or lost, factory reset, virus attack, screen broken, system crash, etc. Finally, if you have any question, please be free to contact us or leave your comment.