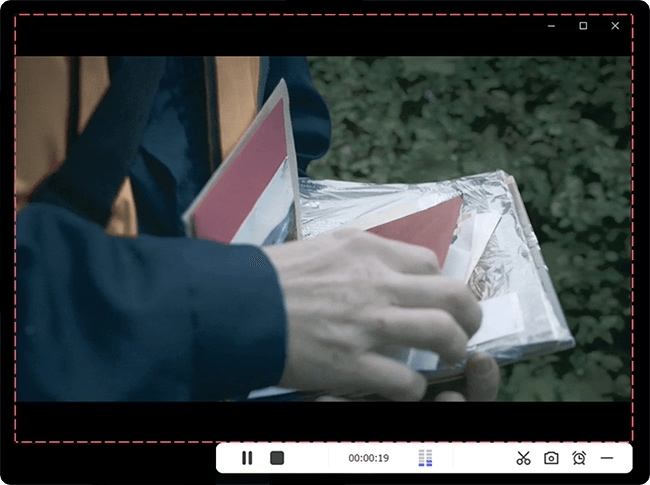
Do you wonder how to record Minecraft? Do you want to make a Minecraft recording by yourself? Do you long for sharing a Minecraft gameplay video online to show your skill? If yes, here is an answer for you. This instruction introduces some best Minecraft screen recorder for you to capture good performance and wonderful achievements from Minecraft. There is no operating system compatibility issue, both Windows and Mac solutions are offered. Also, you can quickly enjoy built-in tool or freeware. Just have a close look with us.
- Part 1. Joyoshare VidiKit (Windows, Mac)
- Part 2. Xbox Game Bar (Windows)
- Part 3. Bandicam (Windows)
- Part 4. OBS (Windows, Mac, Linux)
- Part 5. ShadowPlay (Windows)
- Part 6. Fraps (Windows)
Part 1. How to Record a Minecraft Video - Joyoshare VidiKit
Joyoshare VidiKit - Screen Recorder comes from a comprehensive toolkit, which helps you capture everything on your PC, including video, audio and images. With a user-friendly interface, you can use it without any technical knowledge. It supports various games, such as Minecraft, League of Legends, PUBG, CSGO and Roblox. Beyond that, you can directly save whatever you get in any format, like MP4, AVI, MOV, 4K, WebM, FLV, Vimeo, YouTube, Facebook, iPhone, iPad, and more. It also has other functions, such as schedule recording, add watermark, highlight cursor, and grab voice from the microphone.

- Record gameplay on Windows without lag and glitches
- Capture in-game music from system and voice from microphone
- Offer common and popular format parameter for you to configure
- Record Minecraft in up to 60fps and 1080p/4K
- With shortcuts to quickly start, stop recording, take snapshots, etc.
Step 1 Run Minecraft recorder in VidiKit
Install and launch Joyoshare VidiKit on your PC. Then open up "Screen Recorder" and choose "Record video and audio" mode at the left side of REC button to continue.

Step 2 Confirm preference settings
To save your recordings in a desired format, find and hit the "Options" button that looks like a gear. Click on "Format" and select one you want from the drop-down list. Next, you can set shortcuts to start and stop recording. Furtherly go to "Record time options" and "Cursor options" to finish confirmation.

Step 3 Set capture area and audio
Open your game and hit on "Select Area" under "Capture Area" to frame a matchable area on the desktop. Also, remember to turn on System Audio and Microphone sound in this program if you need them for your Minecraft.

Step 4 Start to record Minecraft
Simply click the "REC" button to record Minecraft gameplay on PC. You can skip and cut any part during recording. Once it stops and completes, you will be taken to a History window that shows everything you record in a list. Preview and edit it here to let it better for saving and sharing.

Part 2. How to Use Default Minecraft Screen Recorder - Xbox Game Bar
Another popular method to record video on Minecraft is using Xbox Game Bar. As a default tool on Windows 10, it provides widgets for us to access quickly, making it an easy thing to record game, microphone audio and webcam. Note that it's only suitable for users who play Minecraft on Windows. Below is a brief guide on how to record Minecraft videos:
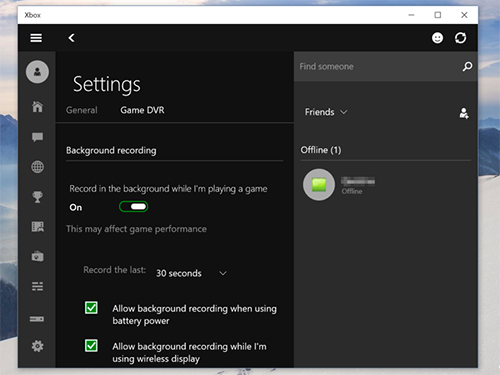
- Step 1: Load the Minecraft on your desktop and then click "Windows" icon > find "Setting" > Choose "Gaming";
- Step 2: Click "Game Bar" on the left if you need to change the shortcuts to start or stop capturing, turn on or off the microphone voice, and take a snapshot;
- Step 3: Press "Windows + G" to call out the "Game Bar" and tick "Yes, this is a game";
- Step 4: If you do not reset the shortcut keys, start recording Minecraft by pressing "Windows + Alt + R". Also, you can directly begin to record by clicking the "Start" button.
Part 3. How to Record Minecraft on PC with Bandicam
Bandicam has a game mode to capture any gameplay and a "Screen Recording" mode to record video and audio without lag. It's a typical lightweight screen recorder for gamers that has ability to record Minecraft at 480fps in 4K UHD. It supports webcam recording to add your face to the footage easily. What's better, with well-designed DirectX/OpenGL/Vulkan graphics technologies, you can use Bandicam to record in high resolution.
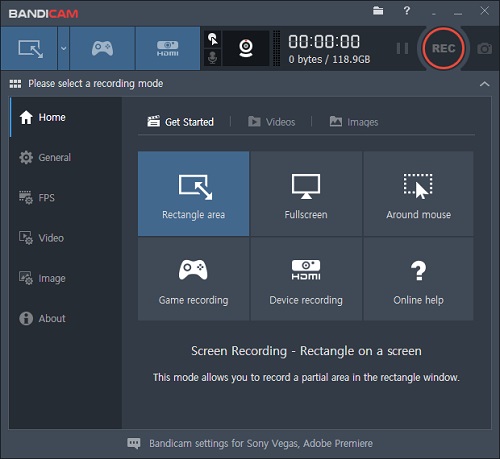
- Step 1: Run Minecraft on your screen. Then open Bandicam and choose "Game mode";
- Step 2: Select the recording area. Then you will see a green number on the top left corner;
- Step 3: Click "REC" or press "F12" on your keyboard to start capturing Minecraft. At the same time, you will see the green number changing into the red. Press the same button to complete the recording;
- Step 4: Select "Home" > click "Video". In this tab, you can play, edit, upload and delete the videos.
Part 4. How to Record Minecraft with OBS
OBS does a great job of recording video and having live streaming. As an open source, it's widely favored by a large number of users. There are handy options this freeware offers to set and capture unlimited scenes and sources. What makes it outstanding is its capability to configure parameters, such as FPS, resolution, etc. Nevertheless, in terms of its product interface and function, OBS is more suitable for professionals or users with certain software operation experience.
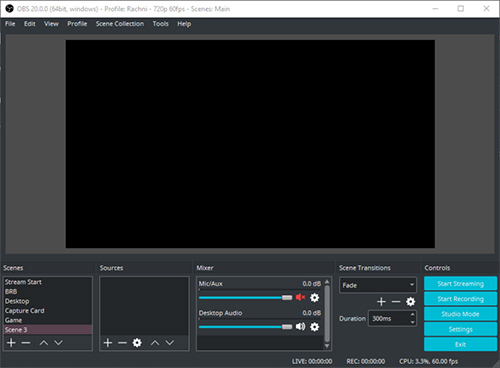
- Step 1: Download OBS on your computer and get it started;
- Step 2: Click on the "+" under Sources, select "Game Capture" option and then choose "Capture any full-screen application" - OK;
- Step 3: The Game Capture will be shown in the Sources list and you can now open Minecraft on your computer on Full Screen;
- Step 4: Go back to check whether Minecraft appears in OBS and you can click Start Recording to capture your game.
Part 5. How to Record Minecraft with ShadowPlay
Based on users' feedback, there is a problem with the ShadowPlay feature in Nvidia Experience to record videos from Minecraft. Most of you probably don't know why. In fact, ShadowPlay just directly supports games that adopts Direct3D, but for the one who uses OpenGL, such as Minecraft, it cannot work normally. To fix this issue, you can follow steps that we show here. Keep in mind that recording with ShadowPlay can impact your game performance, so make sure that your computer system is enough to meet recording requirements.
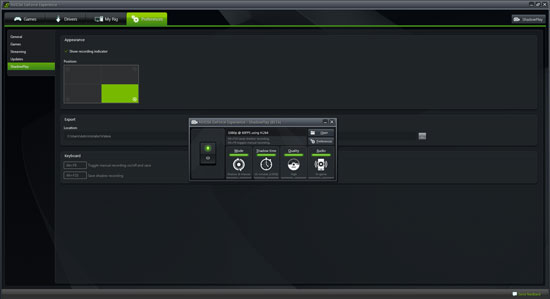
- Step 1: Run ShadowPlay and go to NVIDIA GeForce Experience - Preferences - ShadowPlay to enable “Allow Desktop Capture” option;
- Step 2: Then you can open your Minecraft in windowed mode and click on Record > Start button in ShadowPlay to begin recording your Windows desktop in fullscreen;
- Step 3: When your game gets over, simply press Alt+F9 or click Record - "Stop and Save" to complete recording. Your recorded game videos will by default be saved to your user account's Videos folder.
Part 6. How to Record Minecraft with Fraps
Fraps is a reputable tool with full support for games that use DirectX and OpenGL graphic technology, such as World of Warcraft, Far Cry, Ballance, Trackmania Sunrise, etc. It allows you to record movies and take screenshots easily, offering professional options to set hotkey, customize frame rate, and capture sound. However, the shortcomings are that this tool requires high CPU and records Minecraft with extreme frame drop. So, you need to have optifine and defrag your disc.

- Step 1: Get Fraps downloaded, installed and launched on your Windows;
- Step 2: Go for "General" option on the top of the main interface to confirm basic settings;
- Step 3: Then check "Movies" tab and select video capture & sound capture settings, like the frame rate, capture size, and more;
- Step 4: Open Minecraft game on your computer and click the recording button in Fraps to start the process.
Conclusion:
This article shows you different ways to record Minecraft on PC. Among them, OBS helps record for free and Xbox Game Bar works directly without installation requirement. ShadowPlay and Fraps are frequently asked by users, which are capable of recording games but however cannot be an ideal choice for Minecraft. Luckily, Joyoshare VidiKit records games with no lag and time limit, which is more friendly than others here. No matter which one you pick up from the list, hope you can enjoy both gameplay and recording.


